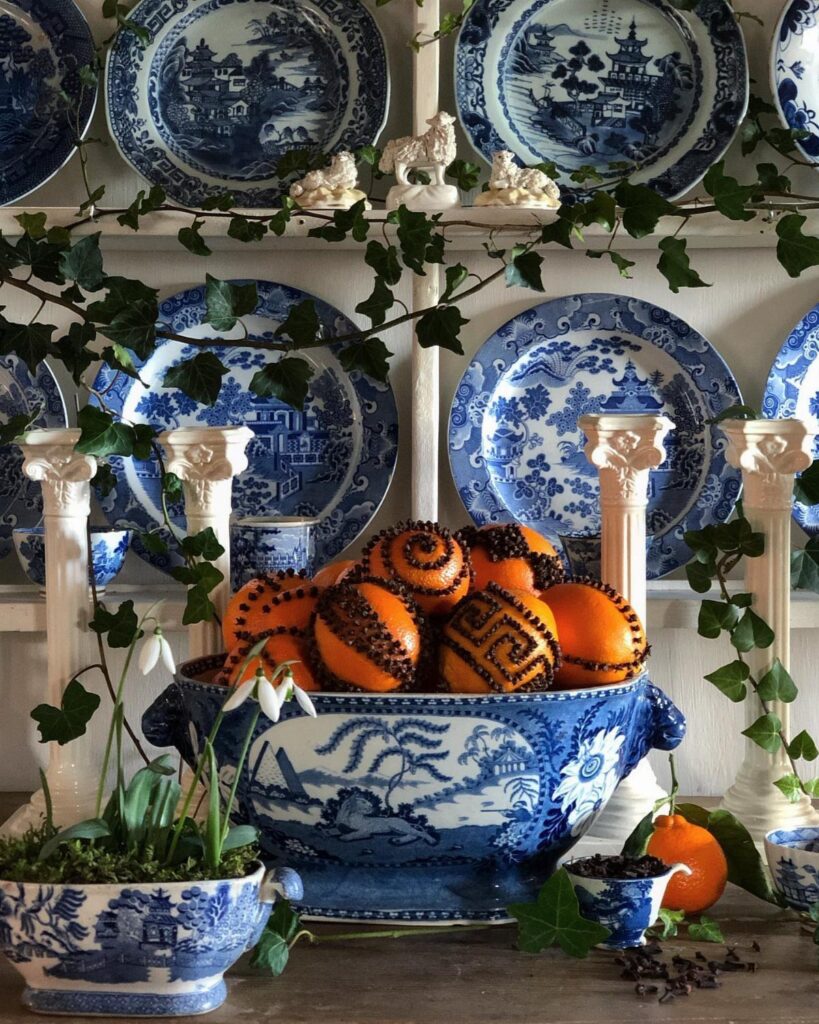
Your skill level and your time decide which of these projects to start with, because the list runs from a bowl of pine cones that takes minutes and no crafting skill to a handmade ceramic angel, the hardest project here.
In between, paper, felt, salt dough and crocheted pieces cost little, and several finish in 30 minutes or less.
If you have one evening, pick the origami paper stars or the dried orange garland; if you have a weekend and some patience, try the poinsettia wreath or the ceramic angel.
1. Poinsettia Wreath
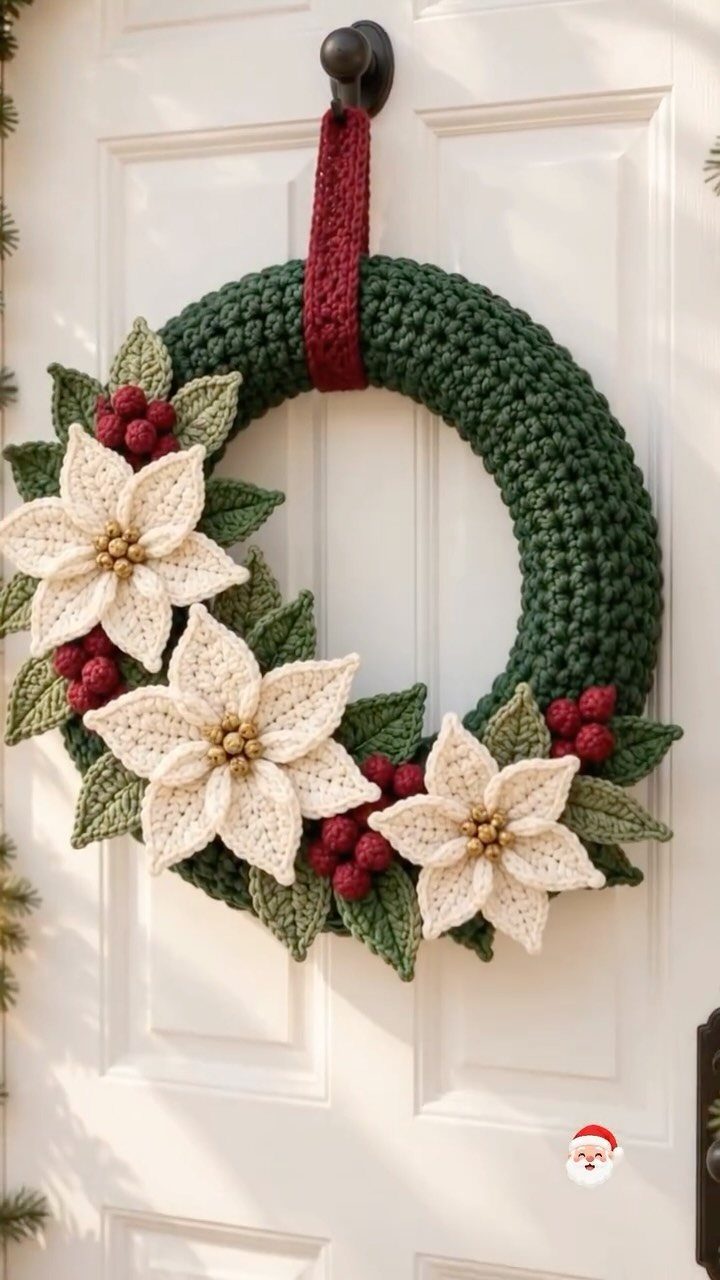
A crocheted wreath trades the usual plastic greenery for yarn, and the cream poinsettias and red berries stay put in wind and weather that would knock real blooms loose.
Hung from a red ribbon on a white door, the colors read as classic without trying hard.
If you crochet already, this is a good use of scrap yarn.
Make the petals separately, then stitch them on. If you don’t, a few cream flowers on a store-bought wreath form get you most of the look.
2. DIY Christmas Wreaths
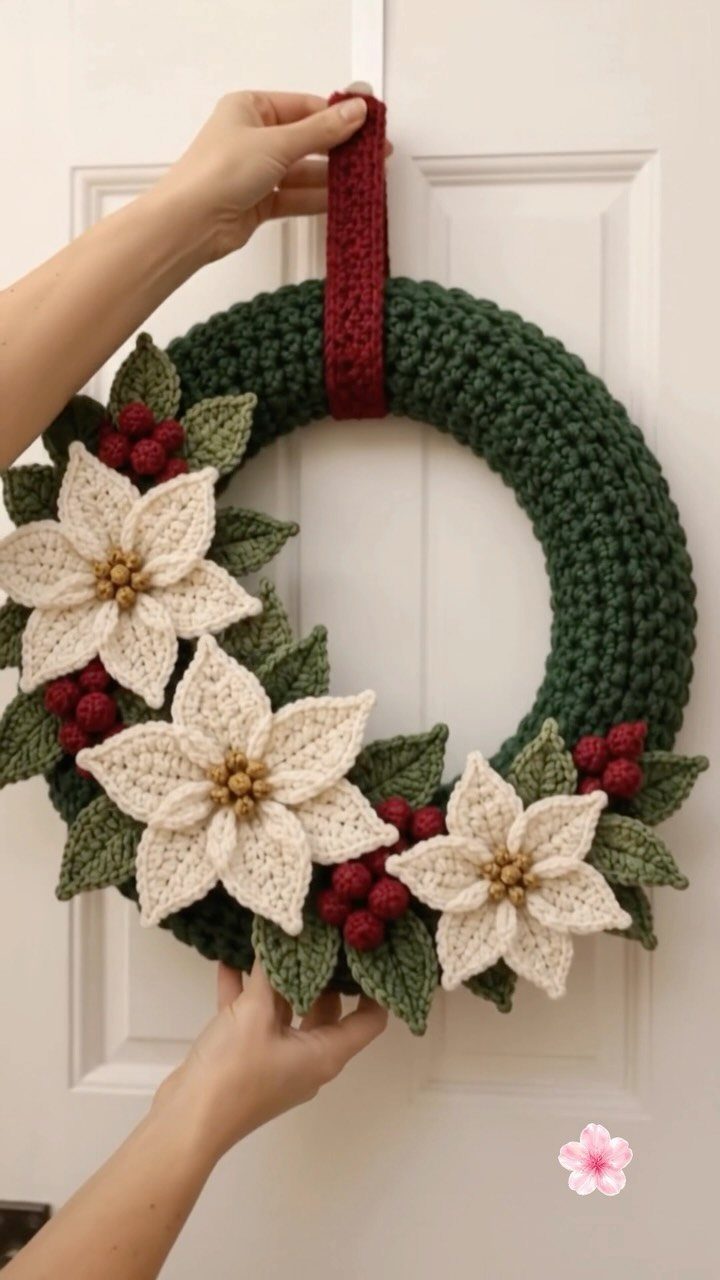
Handmade details are what make a front-door wreath feel like yours.
Crocheted leaves in green, cream poinsettias and a scatter of red berries give you 3 separate pieces to make, so you can stop at any point and still have something that works.
Start with the flowers, since they set the mood. I would keep the palette to those 3 colors, because a door only gets a glance and simple wins.
3. Paper Snowflakes
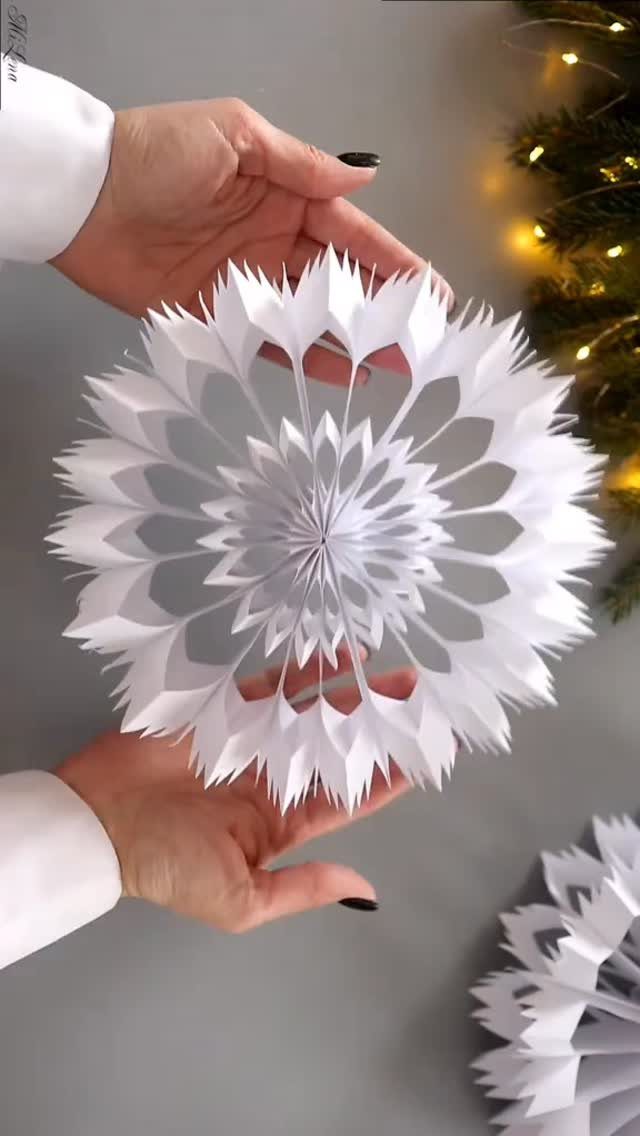
Layered paper, cut and joined into a 3D shape, gives a snowflake real depth. White works best: it picks up the glow of tree lights behind it without competing.
Paper is cheap, so the real cost is patience.
Cut several identical pieces and join them at the center, and expect to make a few before the points line up. Hang one in a window or tuck it among the branches.
4. Leaf Garland Paper Decorations
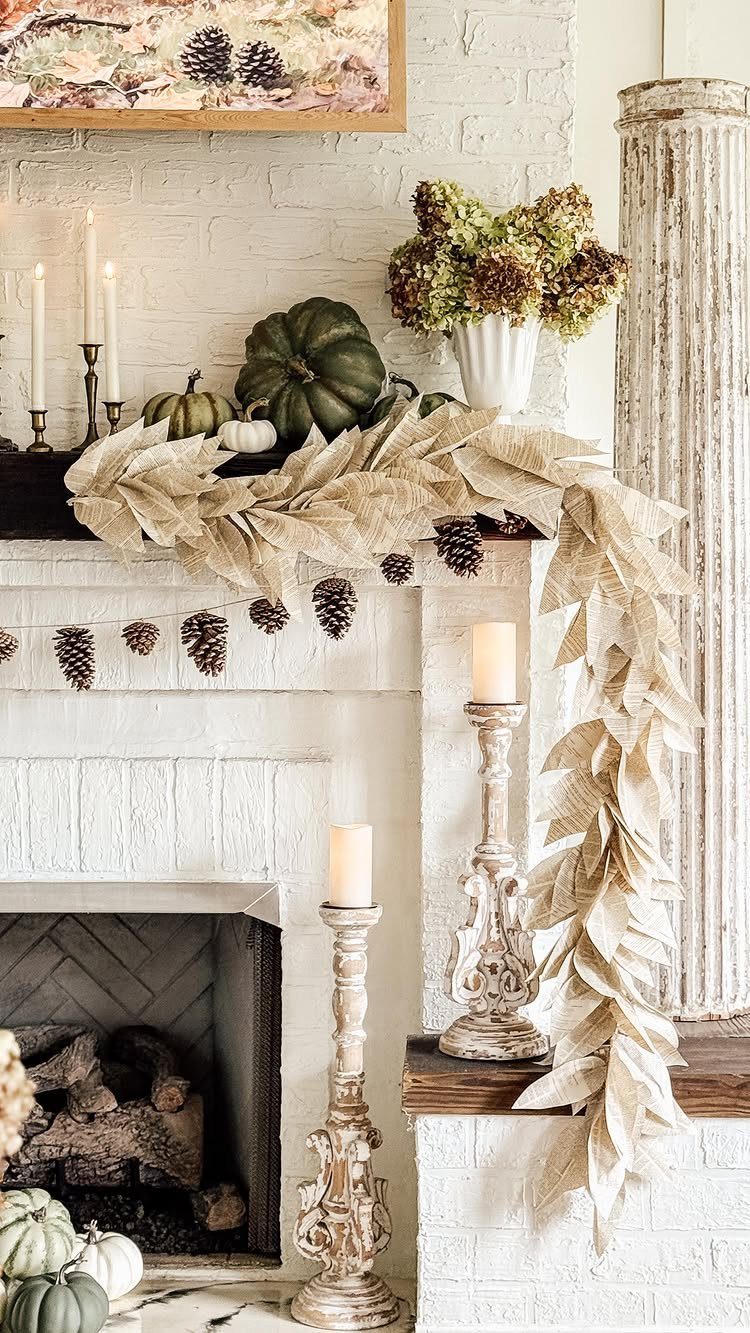
A paper leaf garland in beige is about as quiet as Christmas decor gets. Draped over a mantel with a string of pine cones, it adds texture without a single bright color.
Cut the leaves from heavy paper so they hold their shape, then thread them on string.
I like leaving the ends long so the garland droops naturally. Mix in candles and dried stems for a mantel that carries from fall into December.
5. Pine Cone Decorations
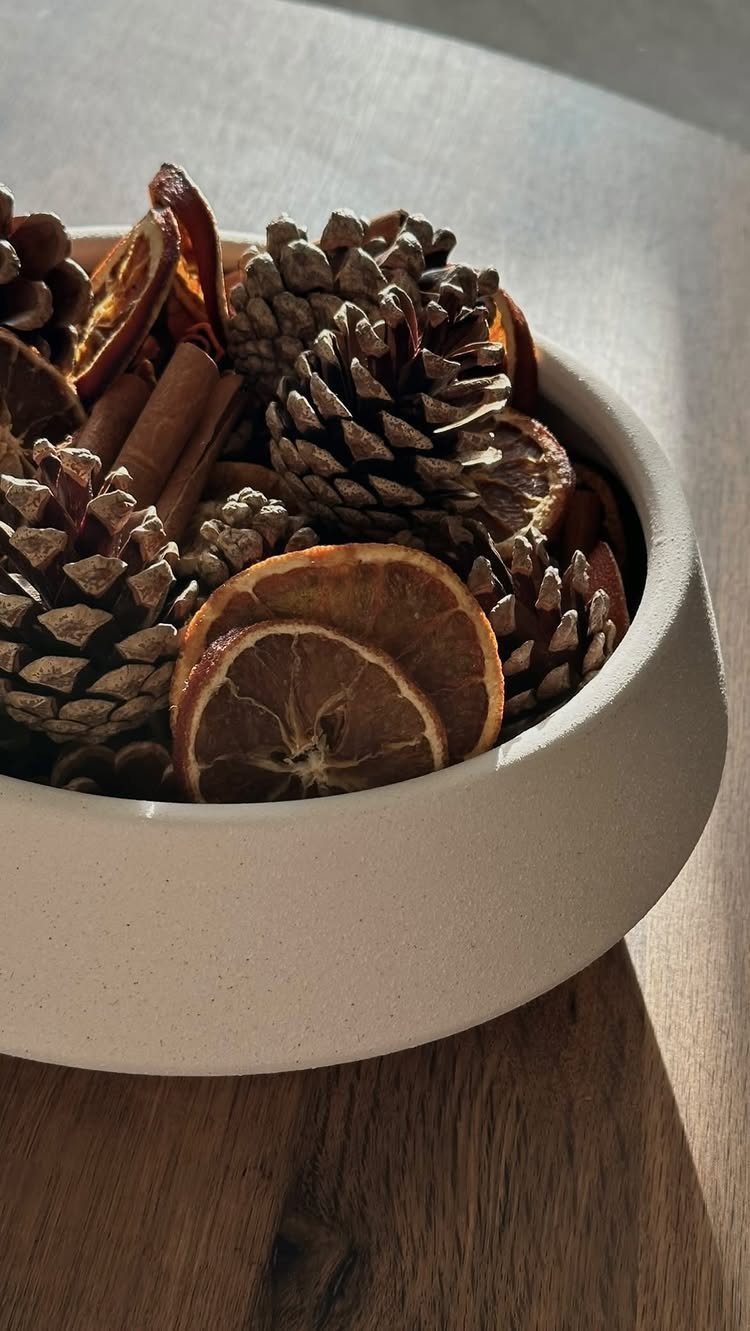
Fill a simple bowl in a solid, neutral color with pine cones, dried orange slices and cinnamon sticks, and you have a centerpiece that needs no crafting skill at all.
A neutral bowl lets the browns and oranges do the work.
It costs very little and takes minutes.
Set it on a table or sideboard, and refill it as pieces break. Pine cones are free if you gather them yourself.
6. Book Page Christmas Ornaments
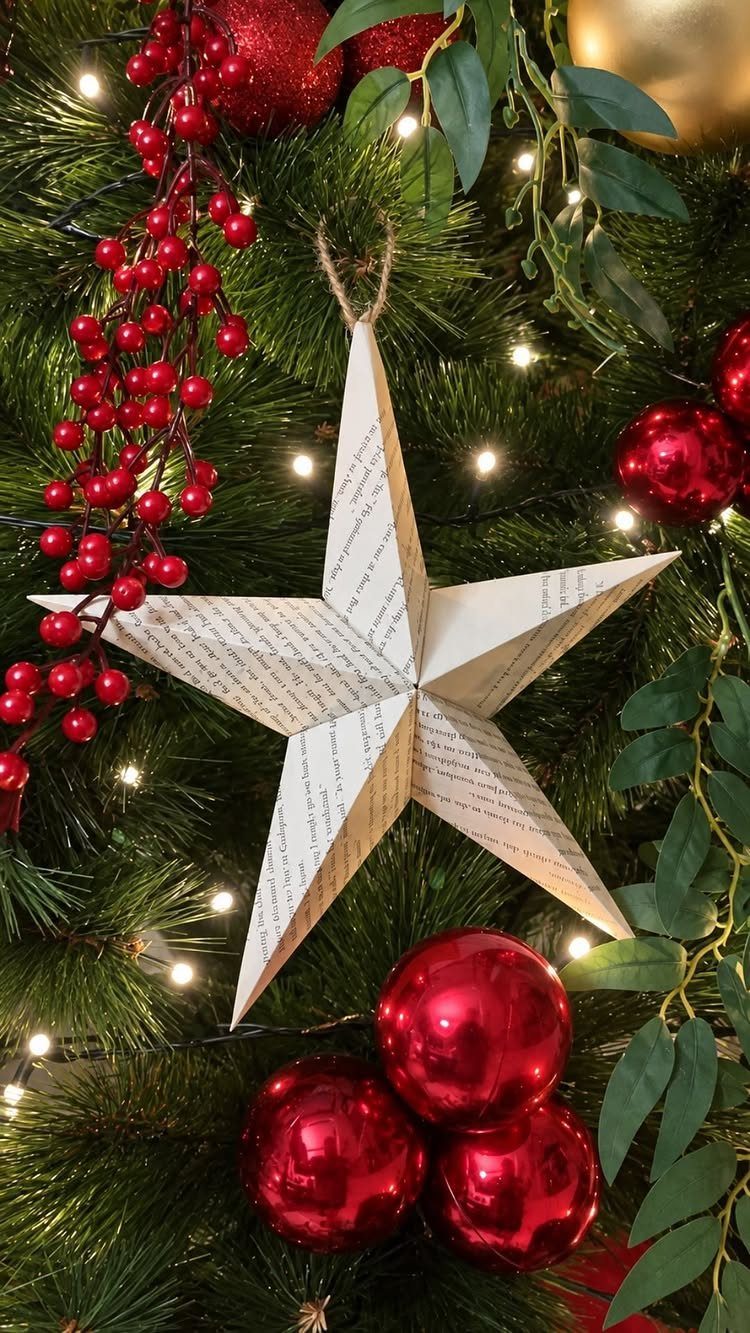
The printed text adds pattern, so you need no paint or glitter.
Pick a paperback you won’t miss and tear out the pages.
Cut or fold them into a star, then add a loop of thread to hang it. Thrift stores sell tired paperbacks for pennies, which makes this one of the cheapest ornaments on the list.
7. Origami Paper Stars
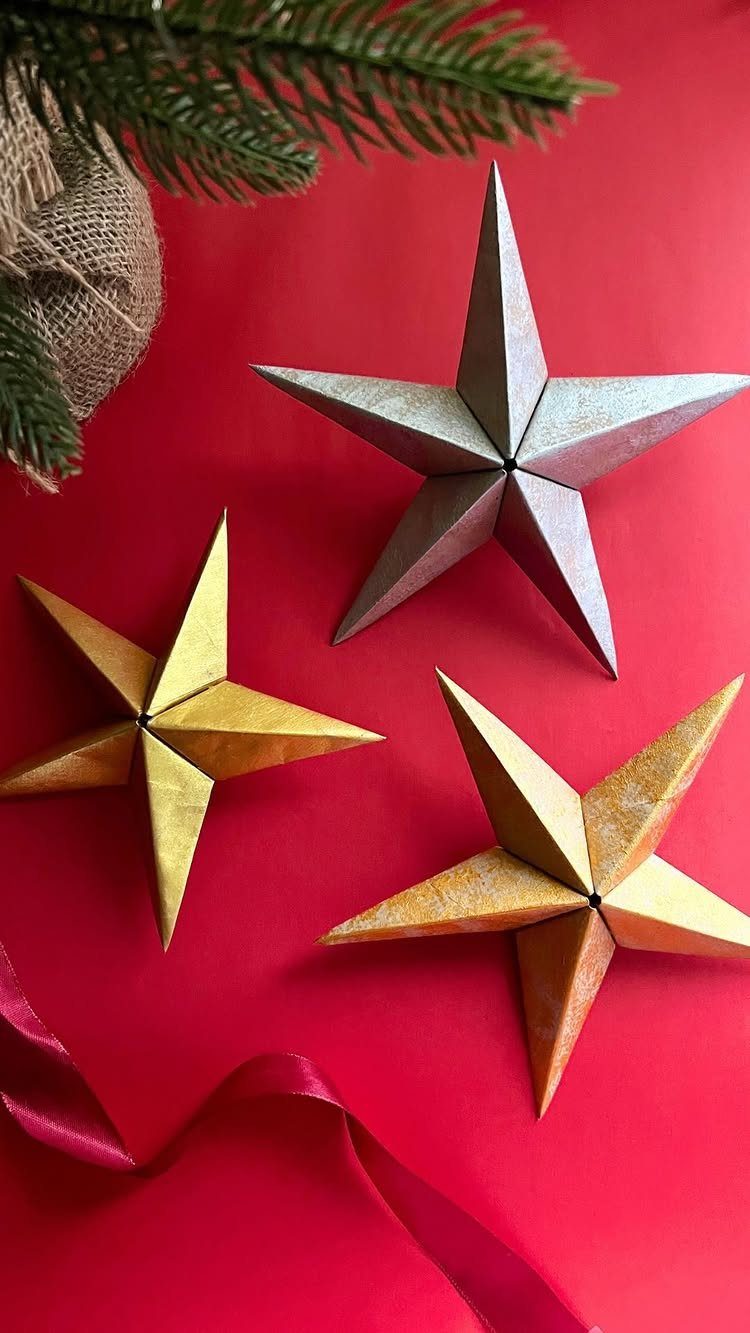
Metallic paper is what gives folded stars their shine.
Pick paper that is colored or foil-finished on both sides, so no white shows at the folds. Make a few in different sizes and group them on a shelf or hang them at staggered heights.
8. String Dried Orange Garland
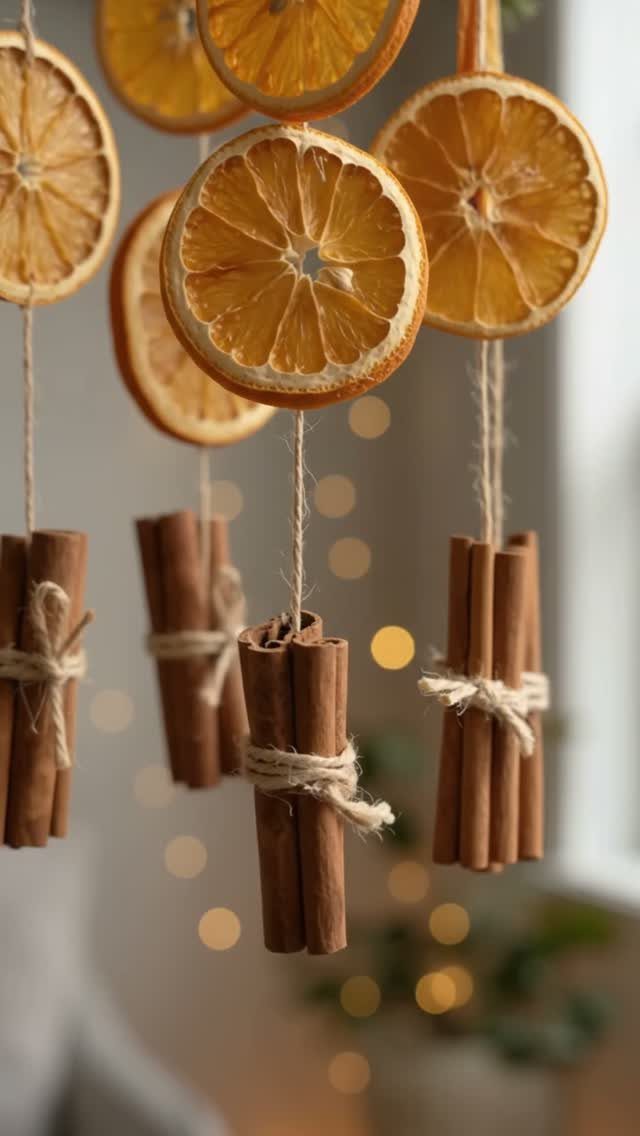
Dried orange slices and cinnamon sticks tied onto twine make a garland that smells like the holiday before you even plug in the lights. Warm lights behind it bring out the amber of the fruit.
Slice the oranges thin so they dry evenly, then bake them low until they feel leathery. Tie each cinnamon stick on with a loop of twine, alternating with the slices.
Drape it over a window or mantel, where it stays dry and the scent has room to spread.
9. Pomanders
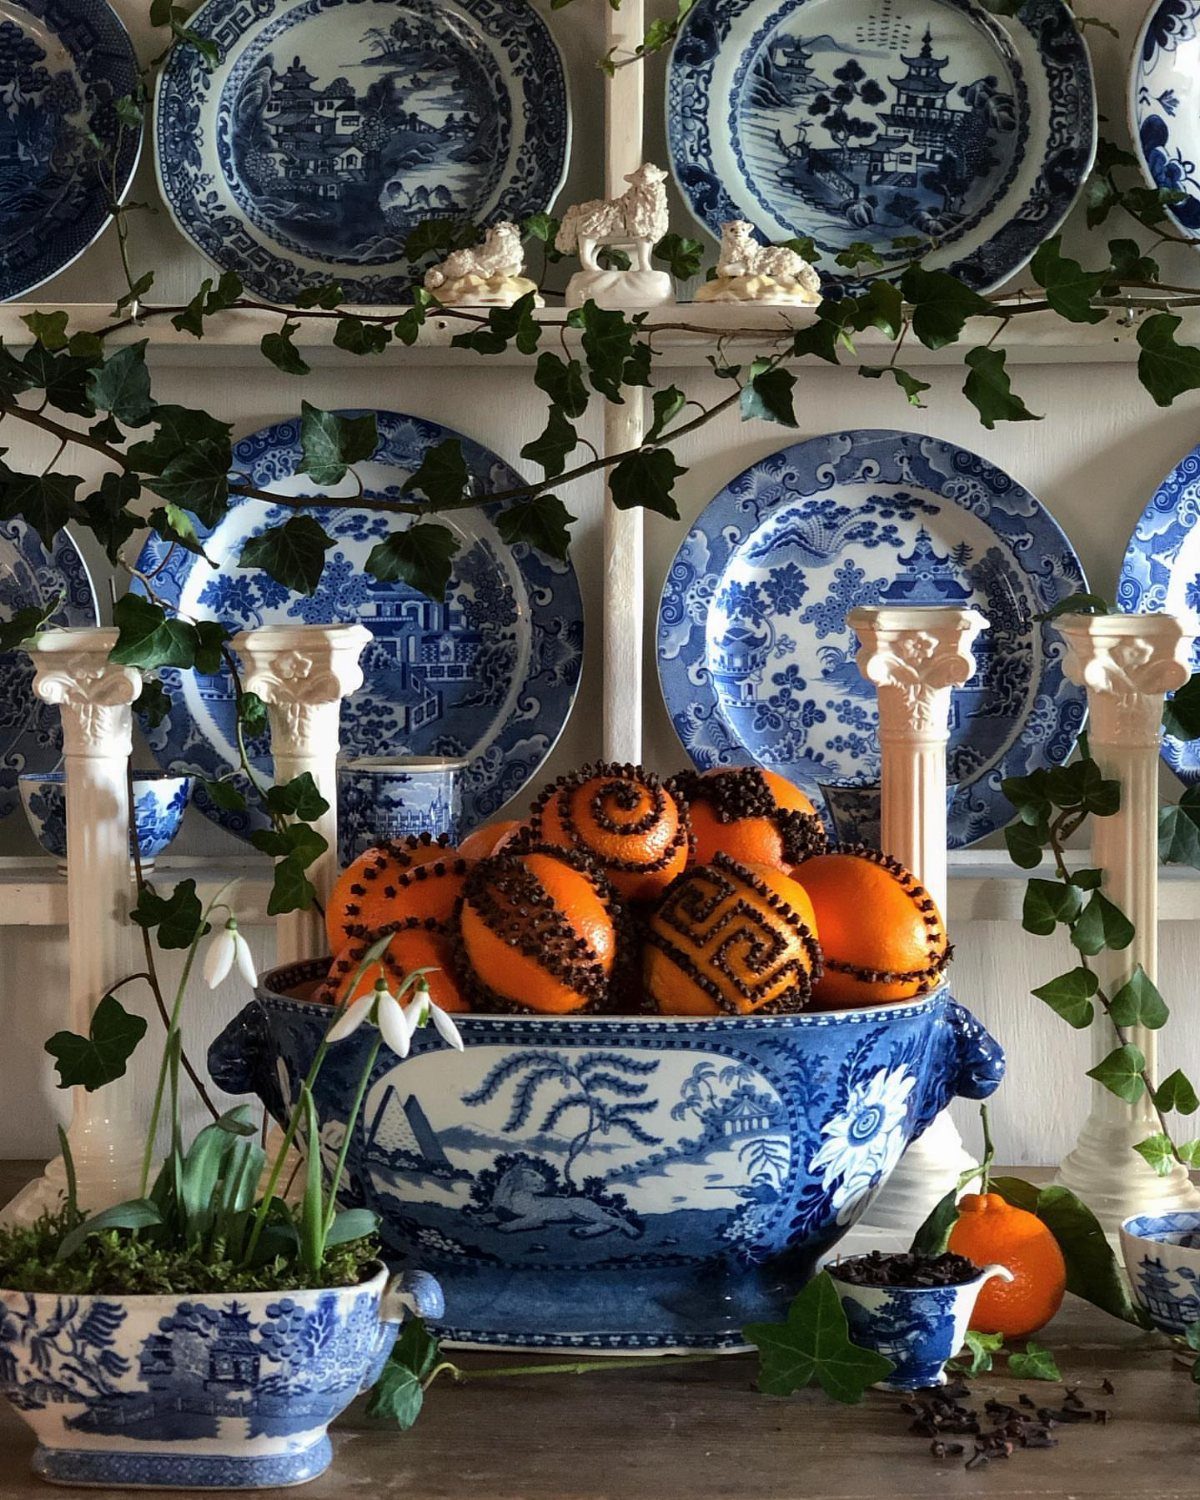
Cloves pressed into a whole orange make a pomander, and a bowl of them gives off a sharp, sweet scent that no candle quite copies.
Push the cloves in close together, in rows or a spiral, until the peel is mostly covered. Heap the finished oranges in a bowl on a table or sideboard.
The cost is a bag of cloves and a few oranges, so make extras.
10. Yarn Trees
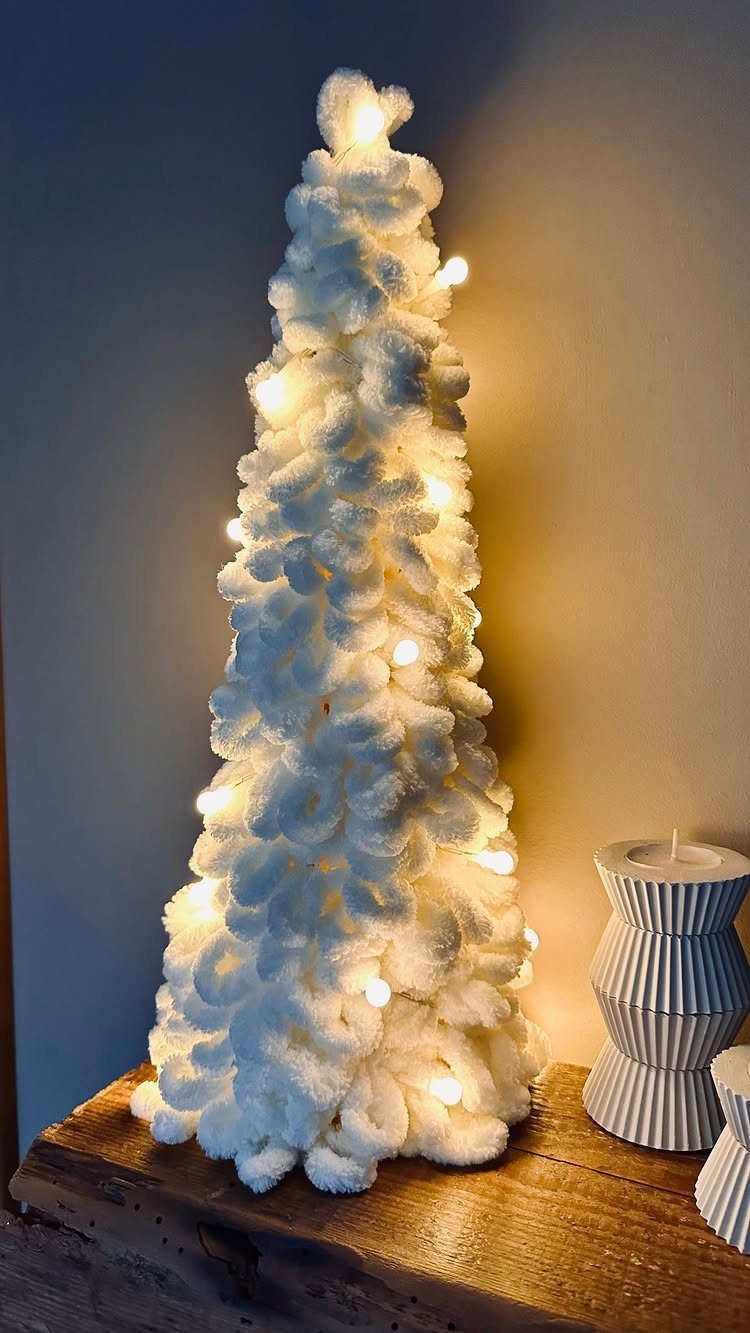
A shaggy white yarn tree is soft where most Christmas decor is shiny. Yarn trees look best near warm fairy lights, which make the fibers glow.
Wrap the yarn around a cone form, layer by layer, and fluff it at the end for that fuzzy look. Choose a thick yarn for a fuller tree.
Keep the lights loose near the yarn so you can pull them out without a fight.
11. Gnome Ornament
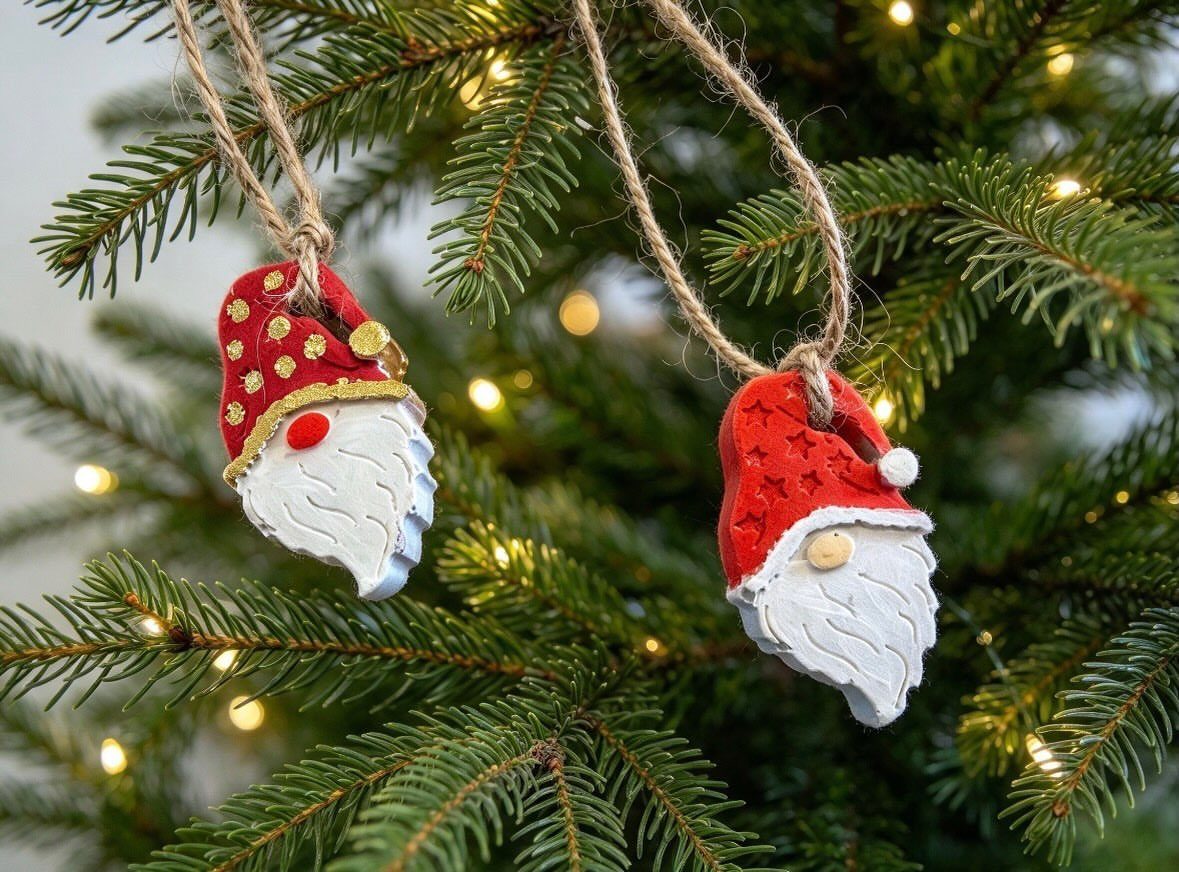
Red hats and white beards are all a gnome needs to read as a gnome, which makes this an ornament you can build from cardboard and twine already in the house.
Two of them on a lit tree look cheerful without crowding the branches.
Cut the hat from red material, add a beard in white, and use the twine as the hanging loop. I would make them in pairs, since a single gnome gets lost on a full tree.
12. 3D Christmas Tree Paper Decoration
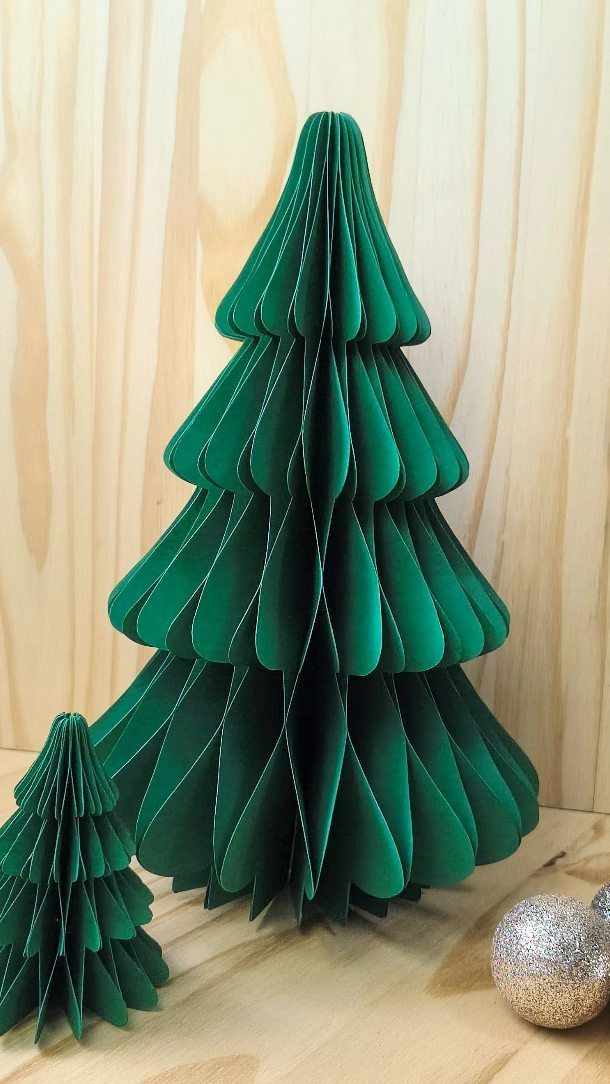
Pleated layers give flat green paper real height, so it stands up like a tiny tree. Make them in 2 sizes and group them together, and they read as a little forest.
Fold the paper in even accordion pleats, then shape the pleats into a cone and fasten them at the base. Keep the folds the same width, since uneven pleats show right away.
It’s an easy project, and the second tree always goes faster than the first.
13. Paper Honeycomb Ornaments
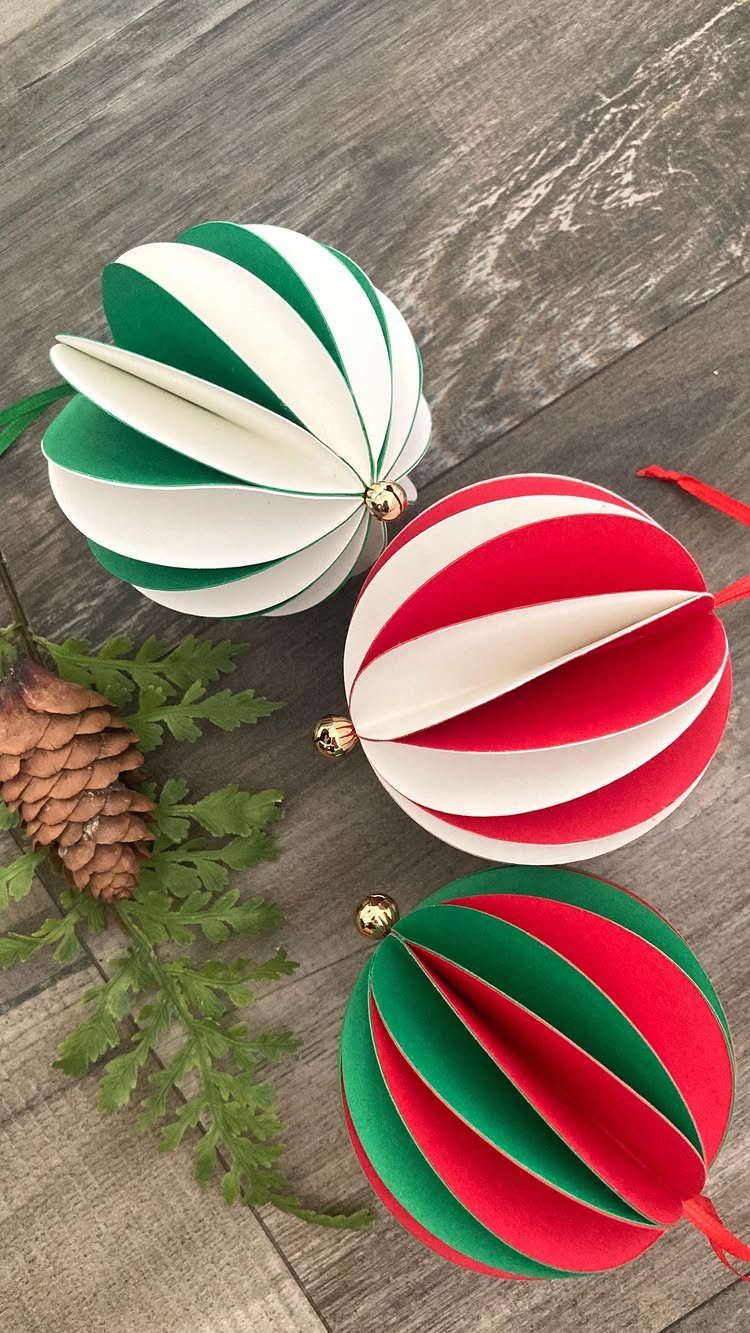
Striped honeycomb balls fold flat and pop open into a round, which makes them one of the easiest paper ornaments on the list. Red, green and white together look like candy-cane stripes and suit a tree without extra decoration.
Make a set in 3 color pairings and hang them in a cluster. They also sit well on a shelf next to a pinecone, with sprigs of greenery tucked around them.
14. Cinnamon Salt Dough Ornaments
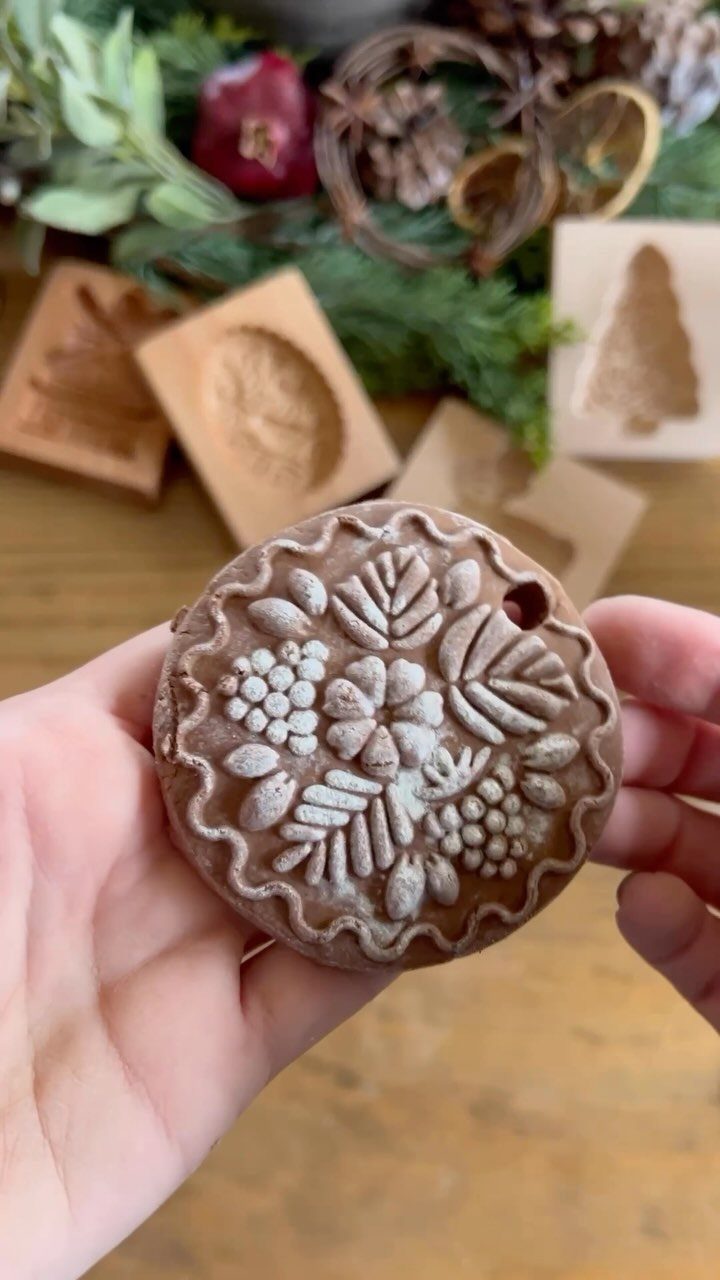
Cinnamon in the dough gives these ornaments a warm brown color and a spicy scent, so you can skip paint entirely. Pressed with a floral mold, the raised pattern shows up well on a plain surface.
Knead the dough on a floured surface for 30 seconds, until smooth. If it feels too dry, add water 1 tsp at a time, since a little goes a long way.
Leave them natural for a rustic look, or paint lightly if you want color.
15. Toilet Paper Roll Ornaments
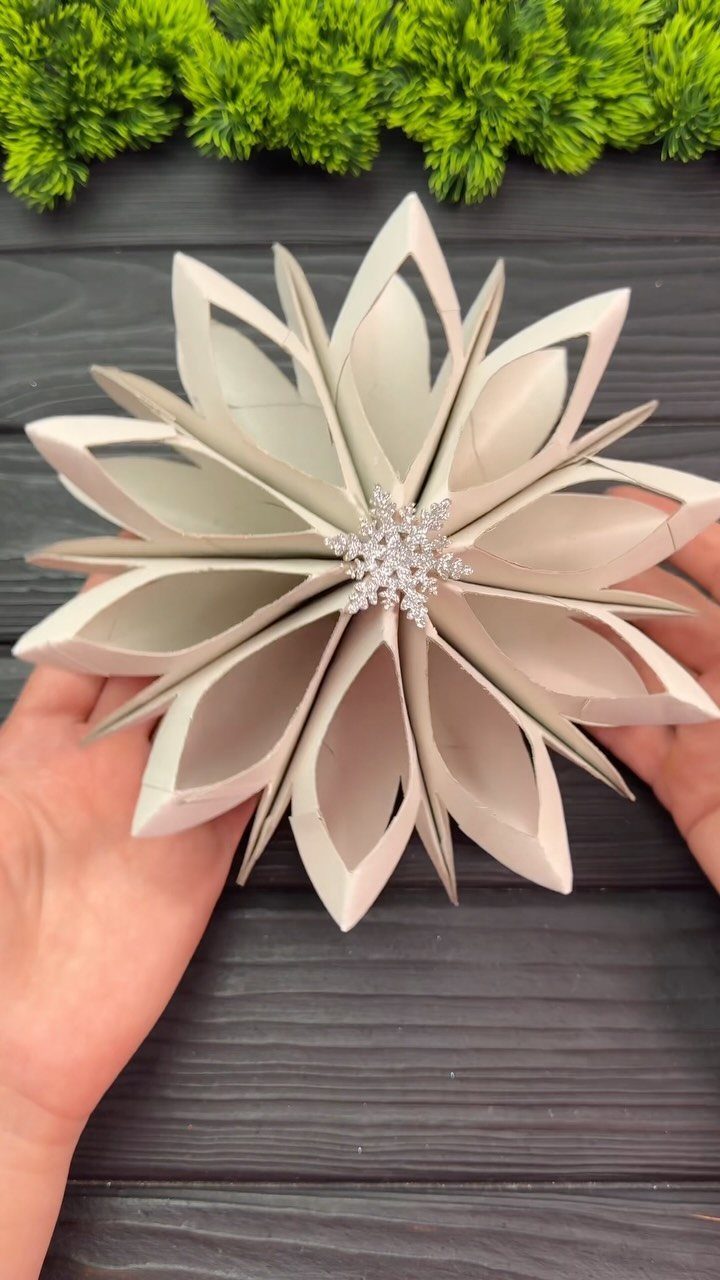
Cardboard tubes cut into rings and joined at the points make a star, and white paint hides the cardboard completely. A glittery snowflake in the center gives it sparkle against a dark tree.
You are saving something that would go in the recycling bin, so the cost is close to nothing. Cut the rings the same width so the star sits even.
Save the tubes through the year and you can batch a dozen in one evening.
16. Felt Santa and Reindeer Ornaments
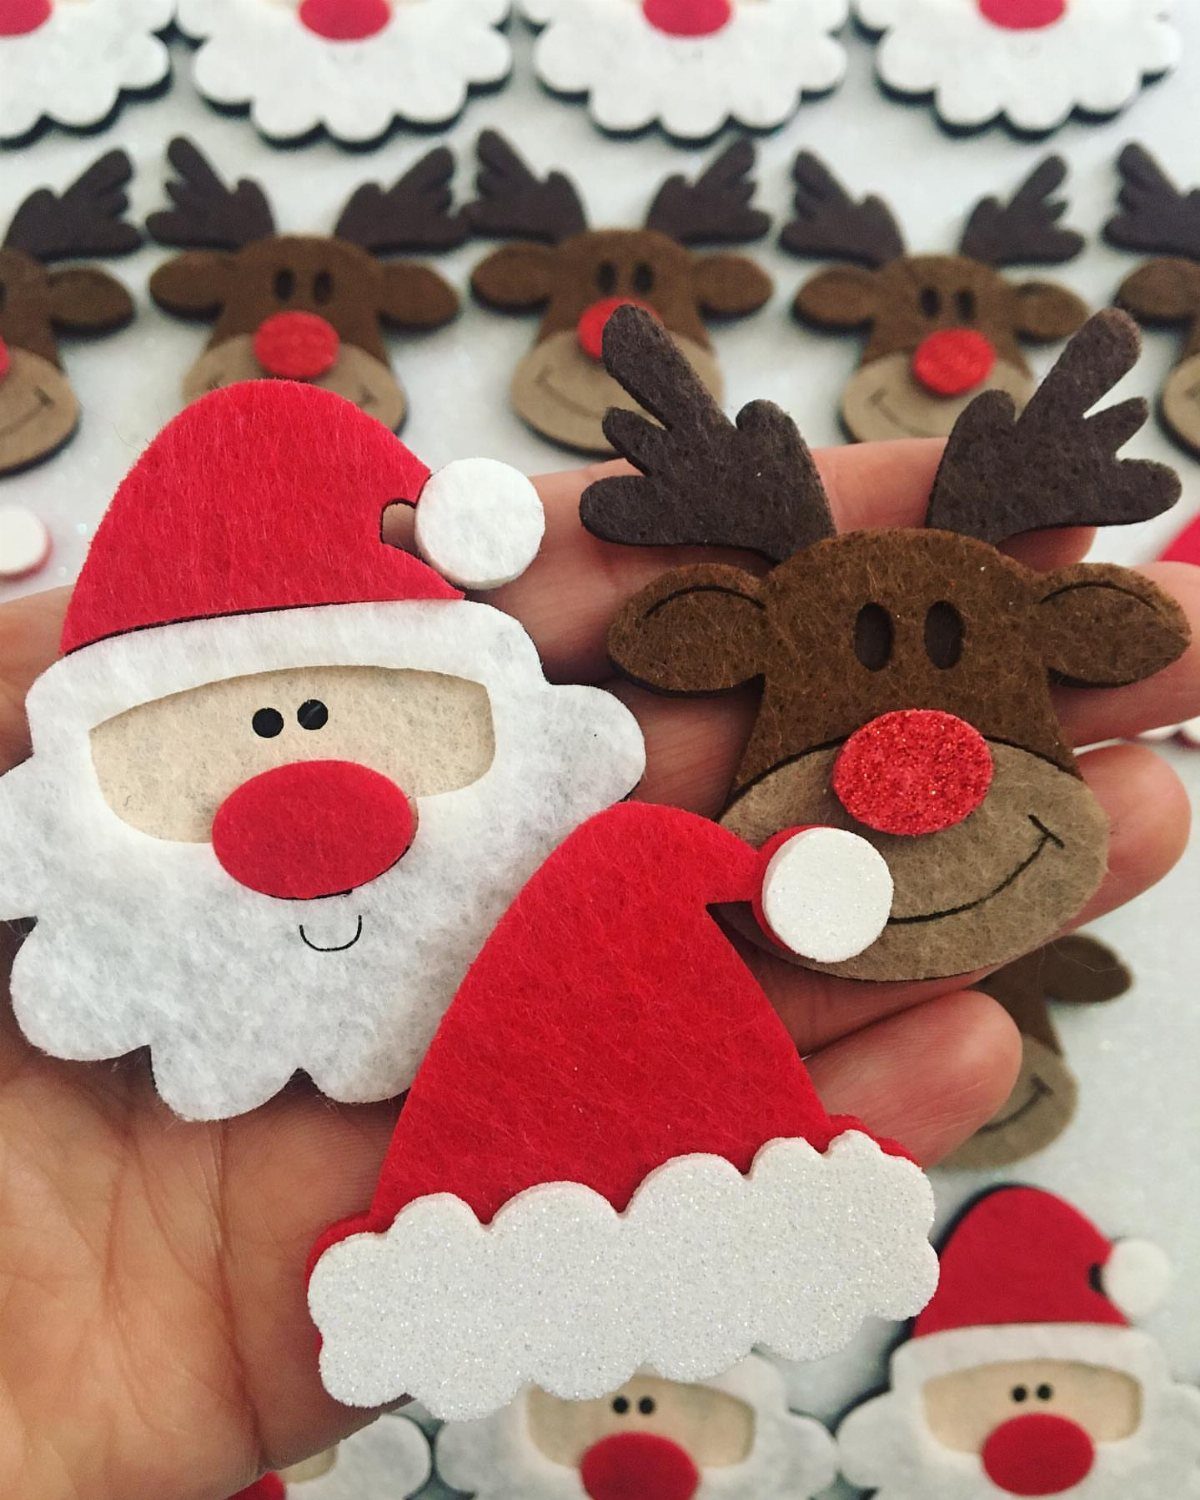
Felt holds a cut edge without fraying, which is why it suits small faces like these. A Santa needs only a face and a red hat, and a reindeer needs a face and a bit of detail.
Cut a few of each so the set feels full. Join the pieces with small stitches or a dab of glue, then thread a loop through the top for hanging.
Glue is faster, but I would sew if the ornaments will be handled often. Felt is cheap by the sheet.
17. Frosted Mason Jar Luminaries
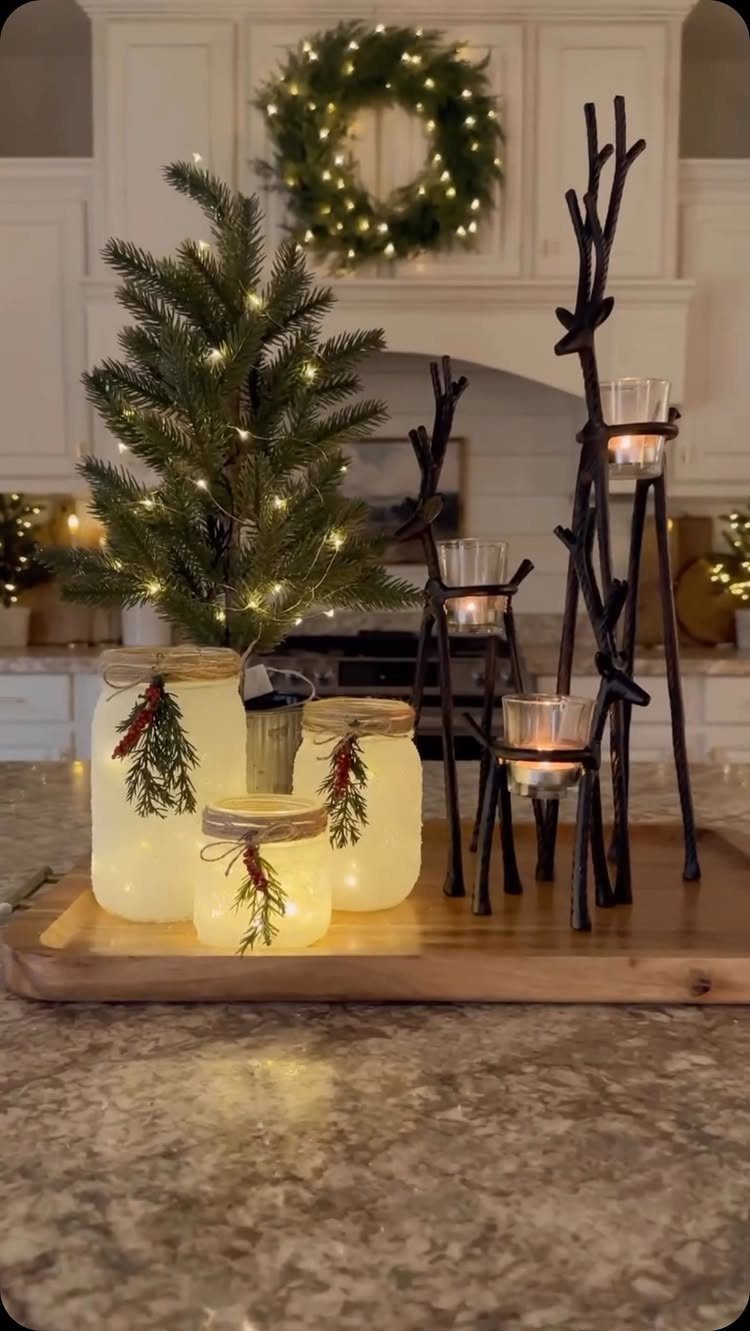
Frosted glass turns a plain mason jar into a soft lantern, and a string of warm fairy lights inside means no open flame. Wrap twine around the neck, tie a bow, and tuck in an evergreen sprig.
Battery lights are the easy choice because there is no cord to hide. Set 3 jars on a wooden tray and move the whole thing to a table, mantel or counter.
It is a cheap project, and you can finish it in an afternoon.
18. Crocheted Santa Garland
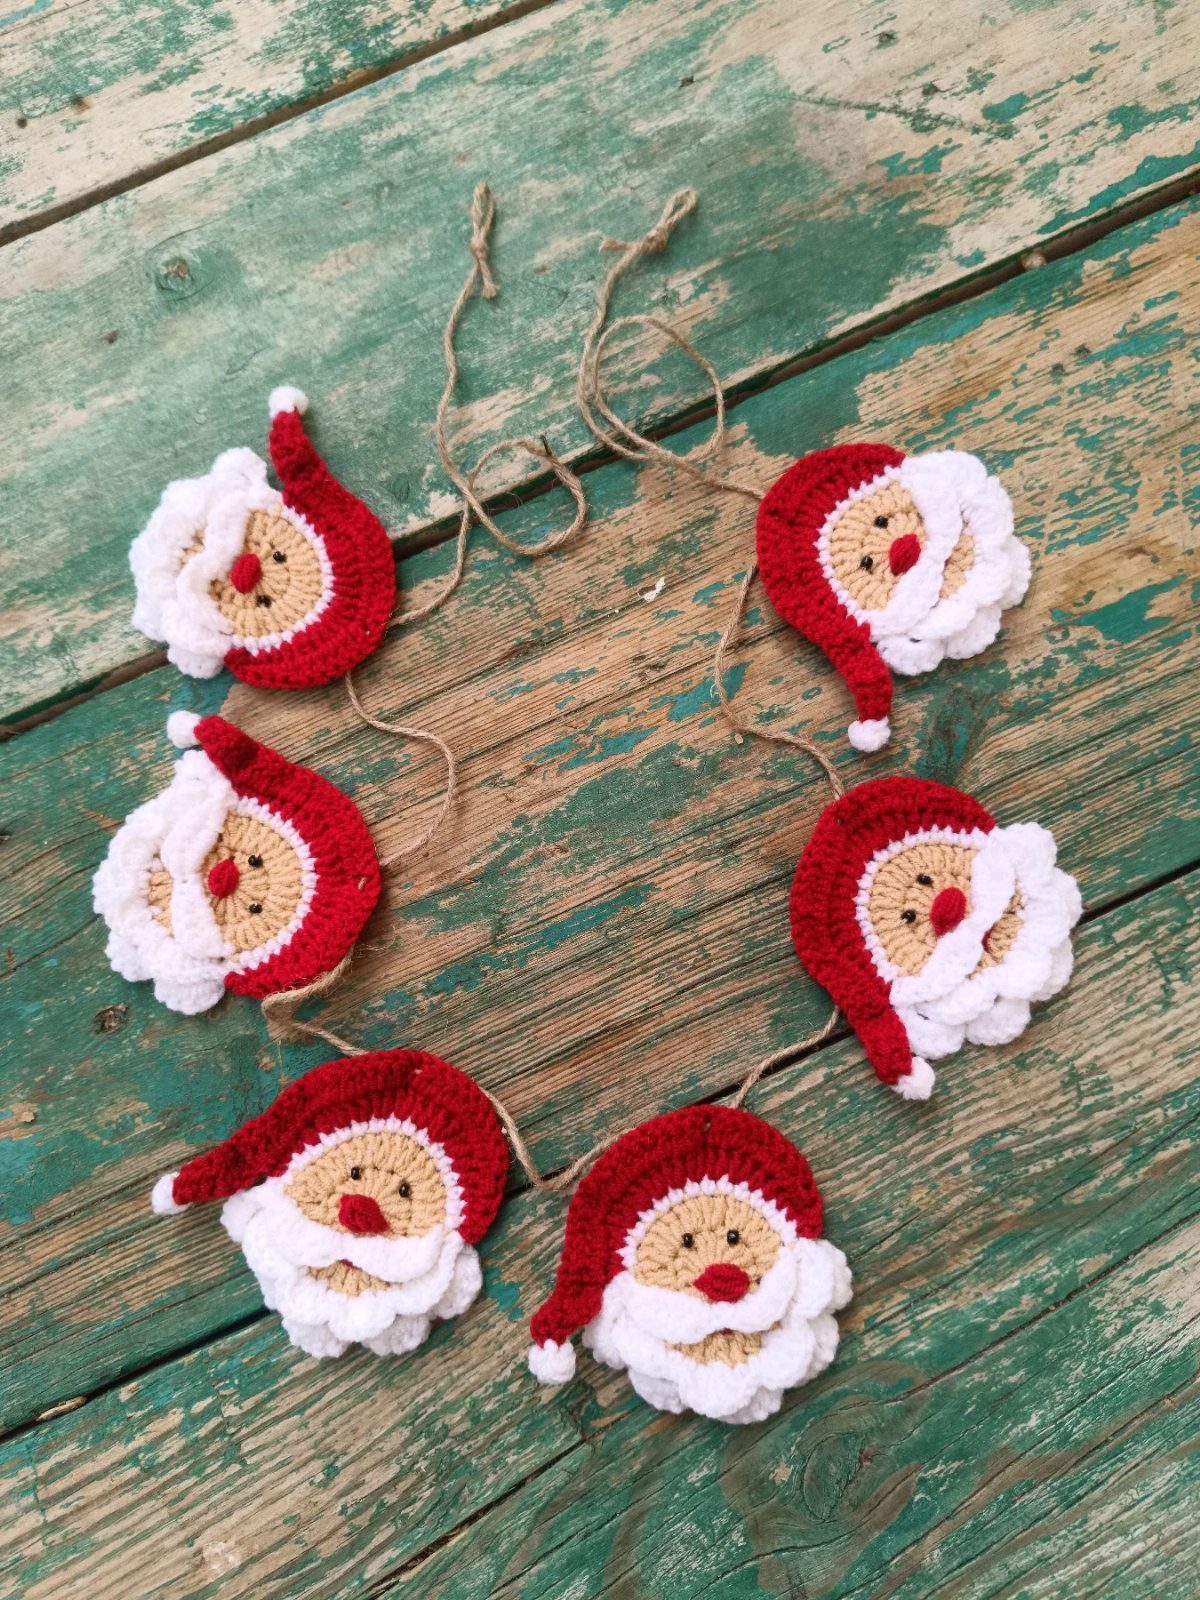
Tiny crocheted Santa faces strung along twine make a garland that looks handmade in the best way. A run of faces strung along rough twine reads as a set, and the twine suits the yarn.
Crochet each face separately, then knot or stitch them on at even spacing. Making them in one batch keeps the sizes close.
Drape the garland on a mantel or shelf, where it can hang freely.
19. Cinnamon Stick Tree Ornaments
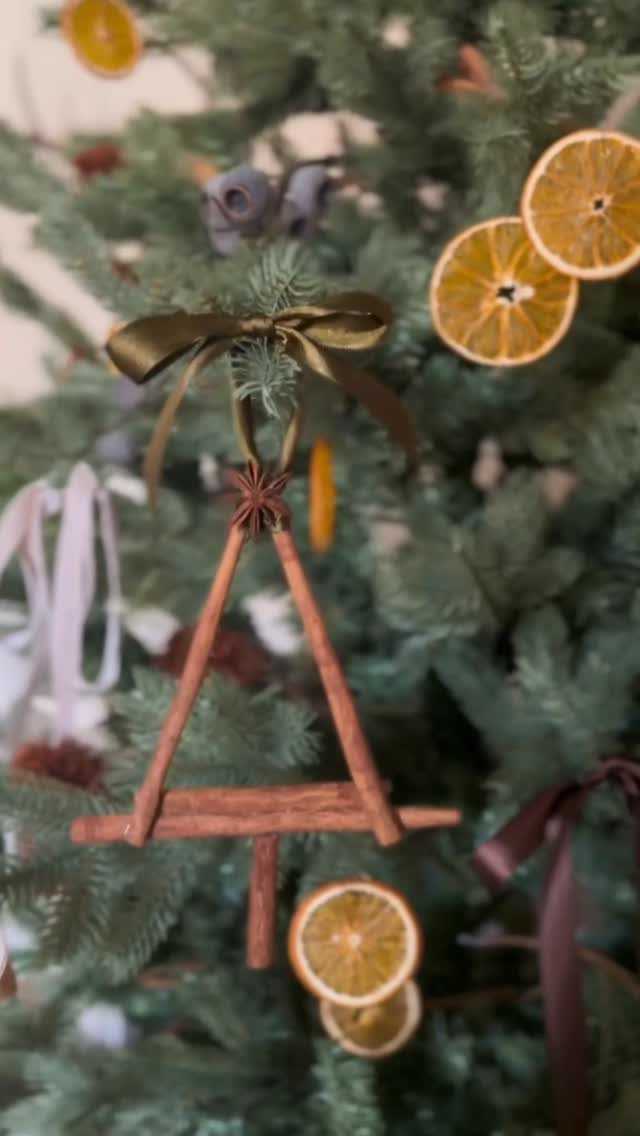
Cinnamon sticks tied into small triangles make a tree-shaped ornament that needs no paint, and the green ribbon holding each one doubles as the hanging loop. Hung beside dried orange slices, they give a tree a warm, spiced look.
Lay 3 sticks into a triangle and wrap the corners with ribbon, knotting tight so they hold. A dab of glue at each joint keeps them from slipping.
Make several and space them through the branches.
20. Hand-Painted Baubles
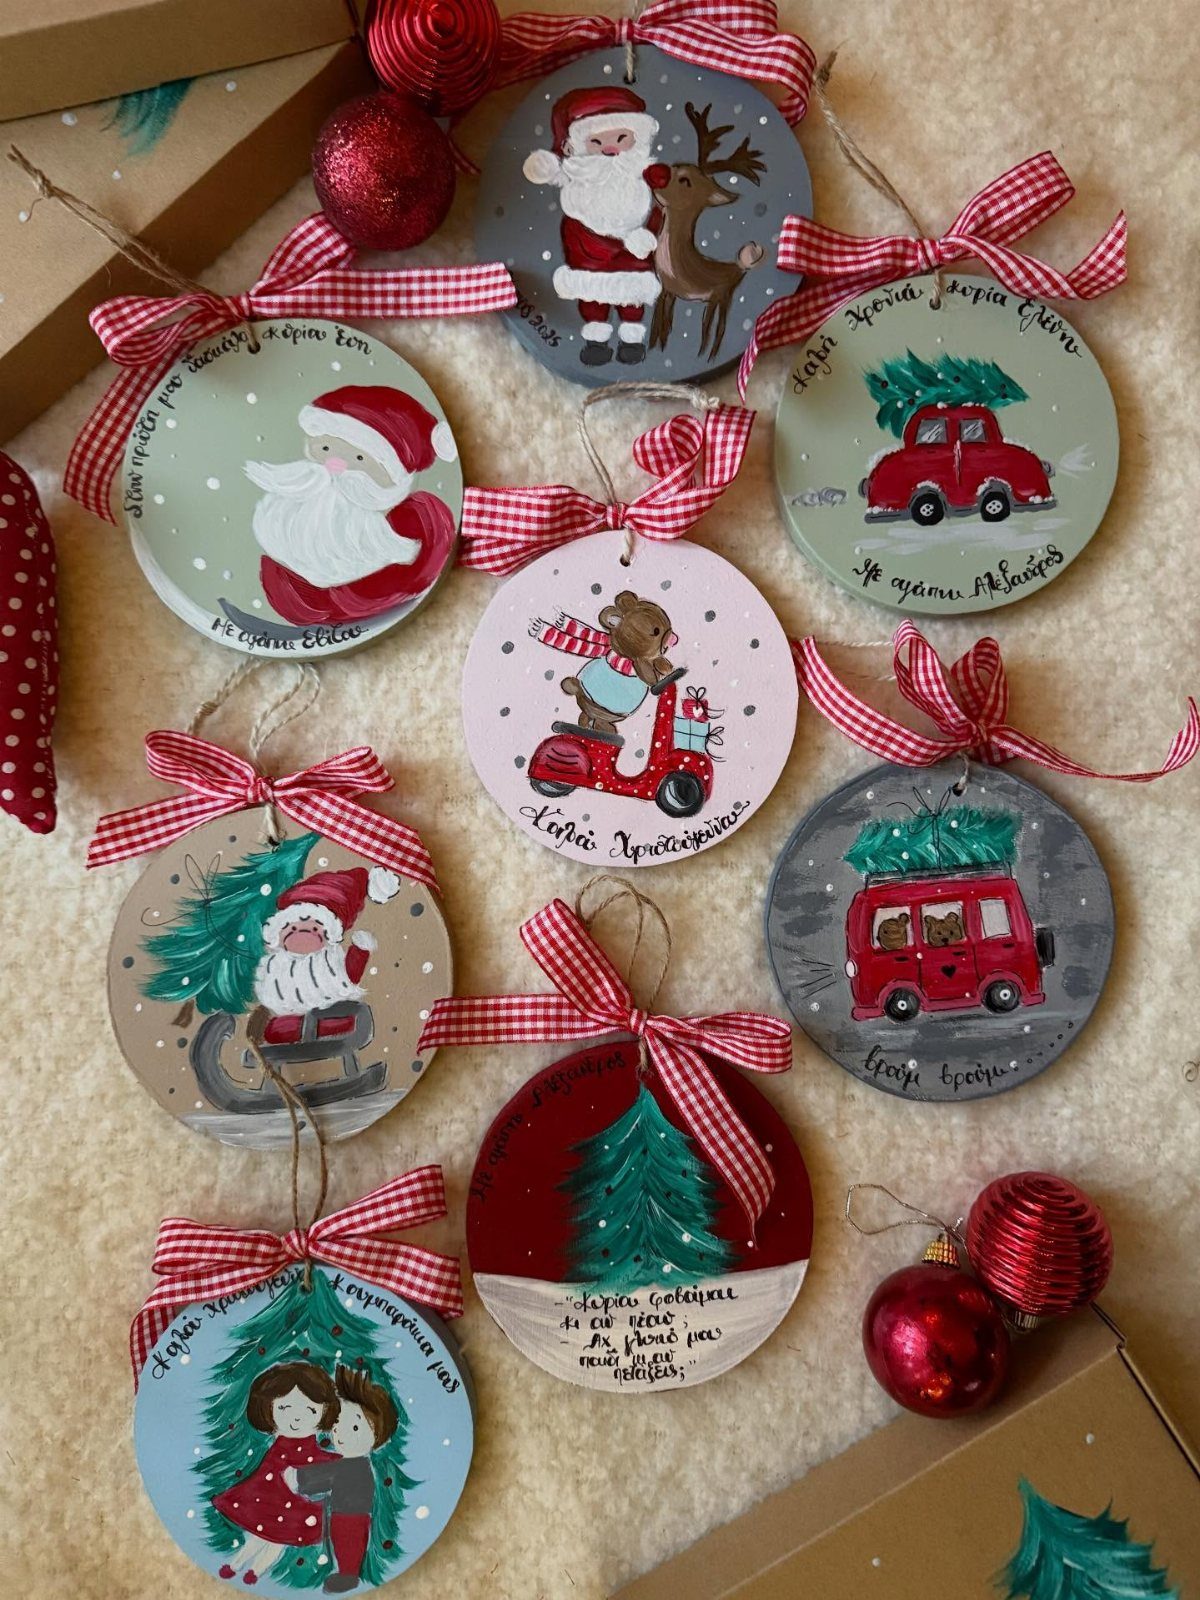
A plain round bauble becomes a small character once you paint a face on it, and Santa, a reindeer or a bear all work on the same shape. A checkered ribbon bow at the top ties the set together.
Keep each design simple, since a round surface is hard to paint fine detail on. Paint one coat at a time and let it dry before adding the next.
Tie matching bows on every bauble so mixed characters still read as one collection.
21. Lighted Wooden Star

A five-pointed wooden frame filled with warm fairy lights makes a glowing star you can set on a mantel, hearth or floor. Resting it on fake snow adds a winter scene without much extra work.
Build the frame from wood strips, then weave the light string back and forth inside it. Battery lights are easier here, since a cord running across the snow is hard to hide.
I would make it large. A small star gets lost next to a full tree.
22. Handmade Ceramic Angel Ornament

A ceramic angel with blue wings and a red heart has a rustic, handmade charm that mass-produced ornaments lack. Twine for the hanger keeps it simple against pine needles.
This is the hardest project on the list, so pick a simple shape and paint only a few details. The wings and heart carry the design, and the color contrast does the work.
Hang it near the front of a branch, where the blue and red show.
23. Mini Present Box Ornaments
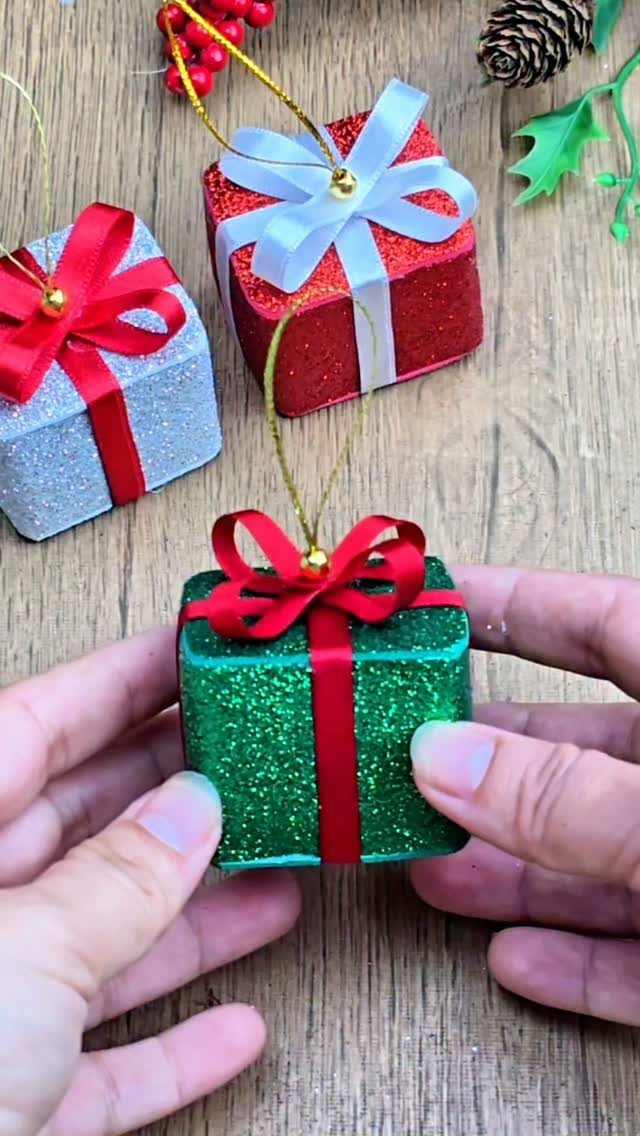
Small gift boxes covered in green glitter and tied with neat ribbon look like tiny wrapped presents on the branches.
Treat each box like a real present: cinch the ribbon tight, tie a small bow on top, and attach a hanging loop at the peak. Glitter paper is simpler than gluing on loose glitter, which sheds.
24. Felt Gingerbread Man Ornaments
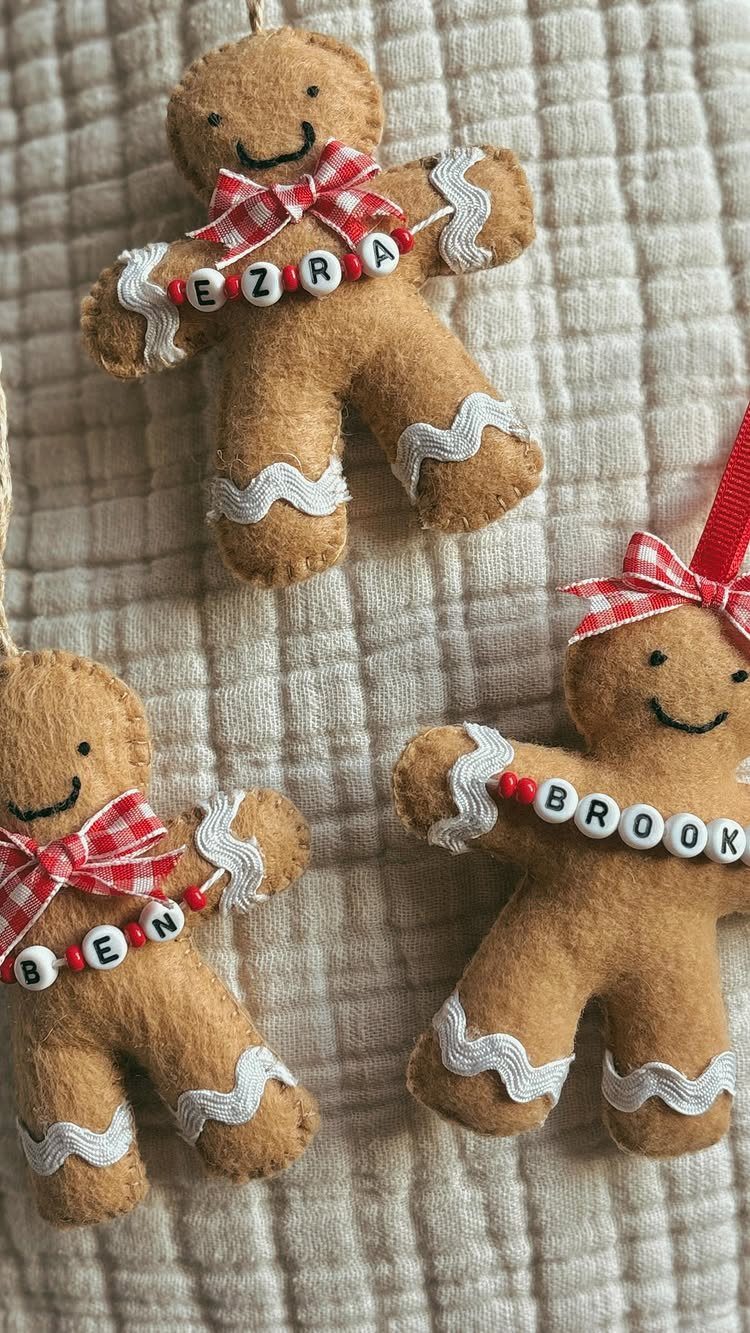
Felt gingerbread men with a name spelled in letter beads make a personal ornament, and a set of 3 covers a small family or a few gift tags. White trim and a checkered bow give each one its look.
Cut the shape from brown felt, stitch the edges with white thread, then add the bow at the neck. String the letter beads on the hanging loop so the name shows.
I would sew them for gifts, since stitching holds up better than glue.
25. Handmade Fabric Poinsettia
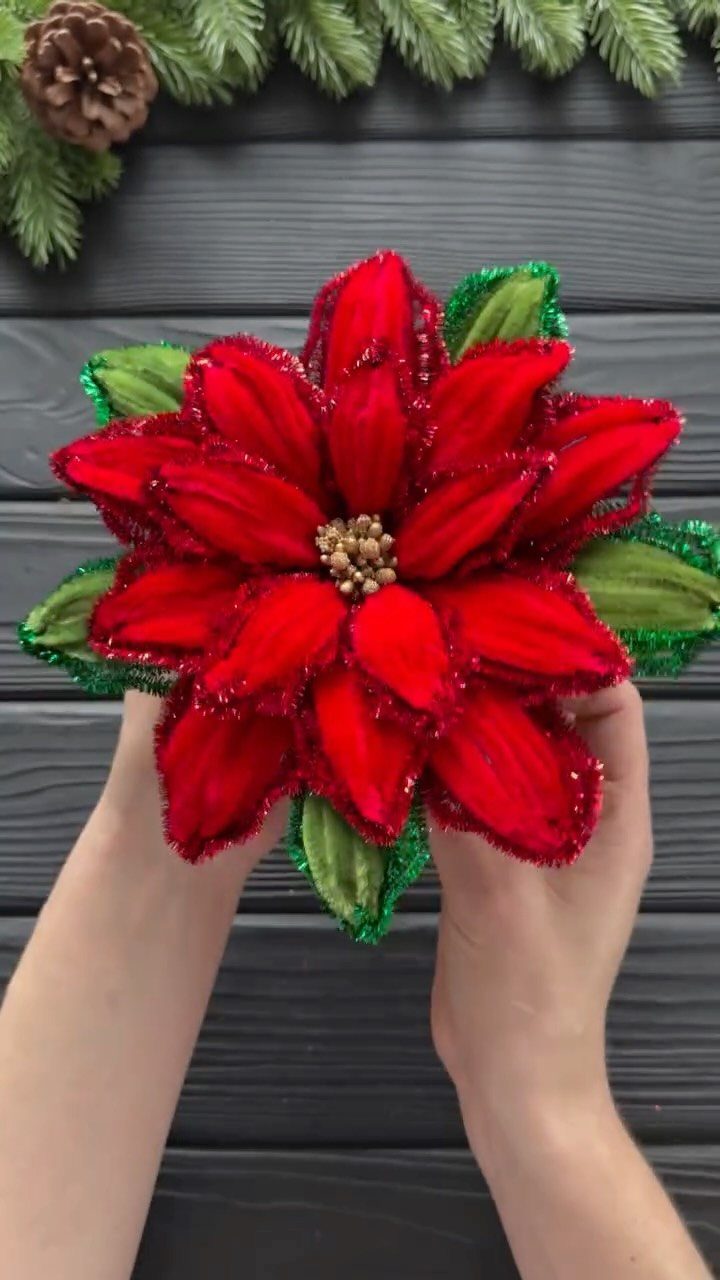
A fabric poinsettia with glitter on the petals catches tree lights better than a plain cloth flower, and the green leaves keep the red from looking flat. One large bloom is enough to hold a spot on its own.
Cut the petals in 2 sizes, layer the larger ones underneath, and glue them at the center. Pin or clip the finished flower to a wreath, a chair back or a branch.
Fabric is cheap, so I would make a pair.
26. Twig Wrapped Candle Holders
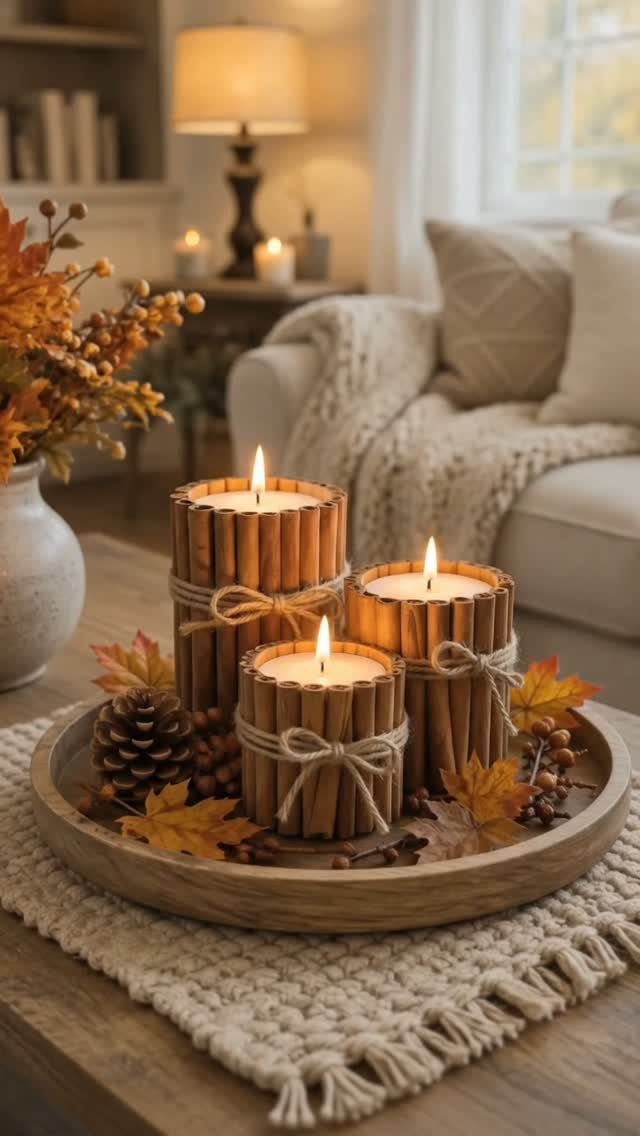
Straight sticks tied around a pillar candle turn a plain column into something that looks cut from a woodpile. Natural twine holds them, and the vertical lines suit pinecones and leaves set around the base.
Cut the sticks to the same height and glue them around a glass jar or hurricane vase, never against the candle itself, and use a flameless LED candle inside, since dry twigs burn easily.
Tie the twine snug, then knot it twice.
Group 3 candles on a wooden tray. I would use flameless candles if the sticks sit close to the wick.
27. Kraft Paper Holiday Banner
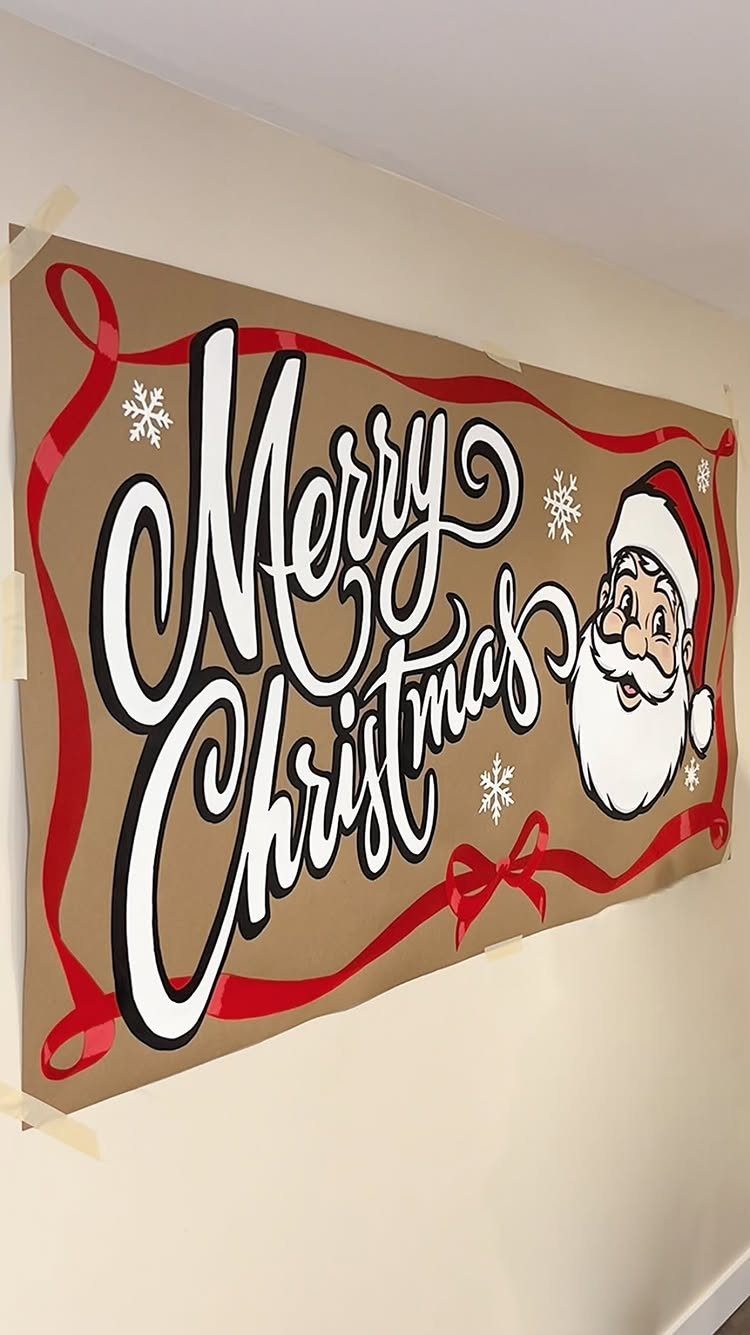
Kraft paper has a warm brown tone that makes red and white paint stand out, so a hand-lettered "Merry Christmas" reads from across the room. Santa and snowflakes fill the space between the words.
Pencil the lettering first, then paint over it, so a slipped letter costs you an eraser and not the banner. Let each color dry before the next.
Tape it to a wall or hang it from ribbon. Paper is the cheapest part, so make a second one.
28. Mini Painted Christmas Canvas
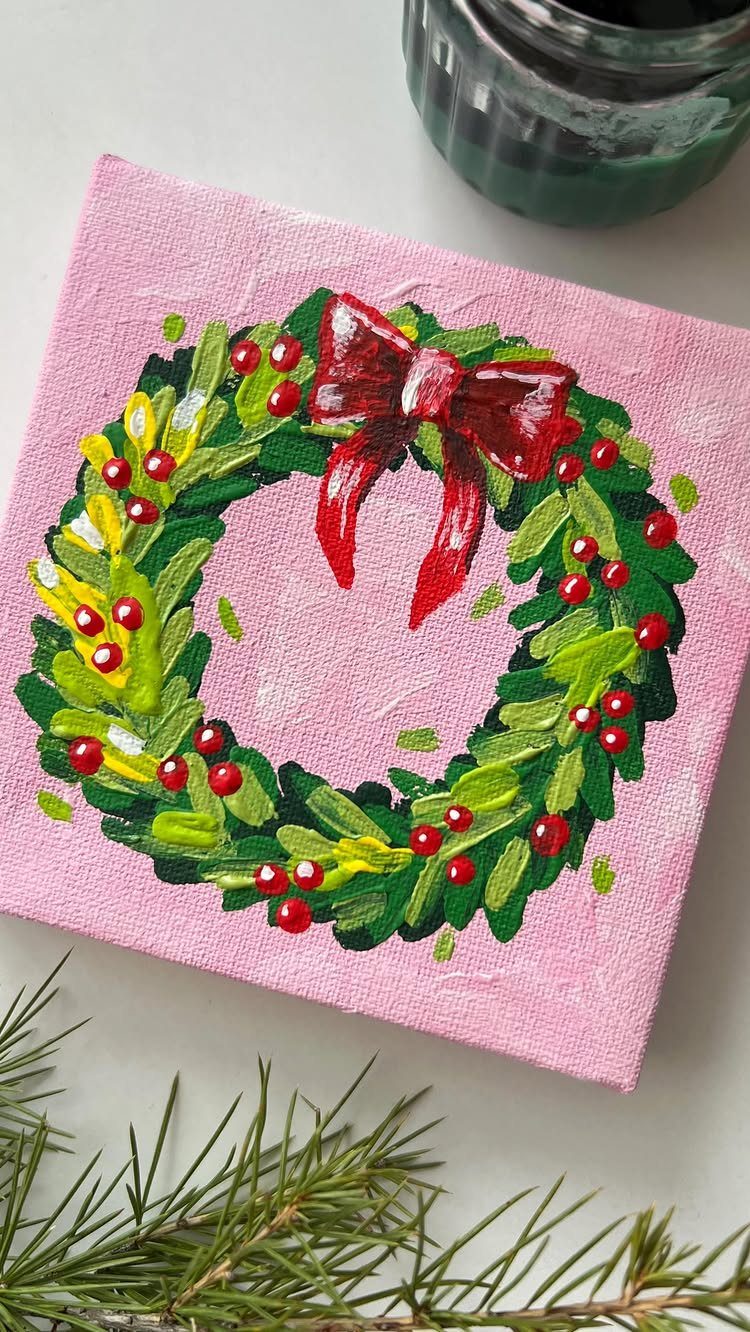
A small square canvas holds a wreath well because the round shape fills the middle and leaves a clean margin. Pink behind the evergreen makes the red berries and bow look sharper.
Paint the background first and let it dry. Then add the wreath in short, overlapping strokes, with berries and the bow last, so the colors stay clean.
It costs little and finishes in an evening. A few of them lined up on a shelf look like a set.
Crafting with Kids
A child’s age should decide the project, so pick the craft first and shop for supplies after. Toddlers do best with big, forgiving steps like tearing, sticking and pressing, while older kids can handle folding, measuring and careful painting.
Set up the table before the kids sit down: supplies sorted into bowls, a wipeable cover underneath, and an apron or old shirt for each child.
A craft table also gives restless kids at a holiday party a job to do, which beats another hour in front of a movie.
Pick projects that give a result they can play with or show off for days. Kids care more about that than about neat edges.
Keep scissors, hot glue and anything sharp in adult hands, and use white school glue or glue sticks for small fingers.
Using Recycled Materials
Natural materials come with a bonus: they are biodegradable, so nothing from the project ends up in a landfill once the season is over. Many of them also make the house smell good.
Before you spend money, check the recycling bin, the junk drawer and the yard. Cardboard, scrap fabric, twine, jars and fallen sticks all work as craft supplies.
Dry anything natural fully before you use it, since damp fruit or leaves can go moldy once they are indoors. Keep dried pieces away from open flames and heat sources.
At the end of the season, compost what you can and store the rest in a dry box so it lasts another year.
Easy and Quick Crafts
Some crafts can be finished in 30 minutes or less, in a single sitting. That makes them a good fit for a tired weeknight when you want to make something but have little time or energy.
Choose projects that need few materials and no special skill. Lay out everything before you begin, so you spend the half hour making and not hunting for scissors.
If a project has a drying step, start it first and do something else while it sets. Then you can finish several pieces in one evening.
Stop when the time is up. A small decoration that is done beats a big one left half-made on the table.
Frequently Asked Questions
What are some easy homemade Christmas decorations I can make?
Paper ornaments, garlands and natural pieces like dried orange slices are the easiest places to start.
A shallow bowl filled with pine cones, a few dried orange slices and a handful of cinnamon sticks goes together in about 5 minutes, and no craft skill is involved.
Pleated paper trees and folded honeycomb balls are also quick, and paper costs very little.
What are some basic Christmas decor ideas?
A wreath on the door, a garland on the mantel and a bowl of natural pieces on a table cover the basics.
String dried orange rounds and cinnamon sticks on twine, and you get a mantel garland that fills the room with a warm, spiced scent.
Add a few handmade ornaments on the tree, such as felt Santas or paper stars, and the main spots are done.
What are the current Christmas decorating trends?
Natural and upcycled materials are the trend right now, for a more sustainable holiday look.
Most of what you need is already around the house: toilet paper tubes, fabric scraps, twine, empty jars and sticks from the yard, with pine cones, cinnamon and dried fruit adding texture and fragrance.
Dry anything natural fully before bringing it inside so it doesn’t go moldy.